The importance of splurging occasionally

Ended up somewhere else for almost a year! Wow, need to get my ducks in a row. The post today is about splurging. If you don’t eat out, which we don’t, and eat a lot of the same things we in and out, like we do, then one meal a week is worth splurging on. Seriously, it keeps us happy and happiness is the ultimate goal here, no? Tonight, we had Balsamic London broil with mushrooms and onions, a baked sweet potato sprinkled with cinnamon and roasted broccoli. Going out we would’ve spent upwards of $40 on this meal (with lots of no, no ingredients), however, eating in this meal cost us less then $4 per person. It was delicious and as an added bonus there was no question about whether or not we could eat it. Here are my tips for making your special meal really special.

395376_10150598827132412_864542125_n

1) Don’t substitute. This meal is your treat. You want mushrooms even though you don’t normally buy them, as they are on the expensive side, get them. Want to have seafood, then get that. Eat steak if you want. This is meant to be your meal. Cut corners the rest of the week. We eat loss leaders most the week, tonight we had what we really, truly wanted. The reason this works so well is, when you have that special meal to look forward to every week, you don’t want to go out. You don’t feel deprived. We traded our habit of going out once in a while for this nice meal every week, works perfectly. We in on a taco bell sized budget and we eat well.

2) Make it a show. Light candles in the middle of the table. Fold the napkins. Use the fancy plates. Remind each other how nice it is to have this food. Positive energy makes this meal even more special. We had sushi (minus the rice)  on sushi plates with chopsticks one night. We even had the little dipping bowls. It felt like we were going out to a restaurant while we were just staying at home. It was fantastic.

3) Add flourishes to your food. This is where adding the splash of vinegar or pinch of cinnamon at the end right before you serve it, pays off. It makes this an elegant occasion. Restaurants make it their business to make your food impossibly attractive. Why shouldn’t you?

4) Enjoy your meal. Even if you cooked it, you should be able to sit, chat and chew. Don’t rush. You have created a masterpiece. Absorb the compliments and do what you would do if you being served.


Toodles,

Rebecca

Cheapskate Paleo Substitutes

I live on a budget. A very close to the wire, you have to wait for your next pay check kind of budget. We do our best to not shop in between shopping trips, cause those little trips add up.  That is when you have to get creative and find new ways to use different foods for the more expensive or used foods you have in your pantry right after your shopping trip but, not towards the end. Or maybe you just didn’t buy that particular product as a result of it being to expensive.  Here is a short list of things that I substitute out on a regular basis almost seamlessly to keep myself on track.

Coconut oil

Coconut oil is like the paleo holy grail of cooking fats, but at $5.99 for this little jar that will last me maybe a week and a half (yeah, I know we go through a lot), it just isn’t worth it.

My Solution

I render my own tallow in a crock pot. I can buy  grass fed suet from my local butcher for 99 cents a pound. With three pounds I can make enough for almost a month. I save $13 a month doing this. I know that doesn’t seem like a lot but, in a year that is $156 I don’t spend on cooking fats. For me, a little bit goes a long way. Saving a few cents here and there really does add up.

Total Savings Per Year: $156

Sweet Potatoes

Sweet potatoes around here cost 99 cents a pound. Not a lot but, I can eat a sweet potato a day if I let myself. In fact I could eat sweet potatoes every meal of every day. Which could get expensive, if left unchecked.

The Solution:

I use whatever starchy veggie is on sale. Seriously, if beets are 48 cents a pound I’ll eat them. If carrots are 30 cents a pound I’ll use them. The trick is knowing where certain things will work. Most starchy veggies can be turned into oven fries (my weakness). I have had beet fries, carrot fries and butternut squash fries. All were very good, yes they do all have their own flavours but, all work. If I am baking something like sweet potato brownies, I’ll substitute the sweet potatoes out for carrots or an orange squash. This works very well, just make sure you use the same amount of bulk in the recipe. If you are using the starch as an after workout meal, any of the above will work. You can even mash most of the above ( I wouldn’t suggest mashed beets by themselves, they are good mixed in with mashed squash or to stretch sweet potatoes). This trick can save me a trip to the grocery store and the 50 cents a pound on sweet potatoes. If I were to eat an average of 4- 1lb sweet potatoes a week this would save me $2 a week or $8 a month. In a year this would save me far around $96. Not mentioning the gas saved by not going to store and the added problem of if I go to the grocery store I am  likely to pick up at least 5 other things.

Total Savings Per Year: $252

Ghee

I cannot get grass fed ghee locally. So I have to settle for getting a small 7.8 ounce jar for $15. Yikes! Granted, I only use this occasionally when I want a buttery flavour, but still I like to have a little around. I might use this jar over a couple months. But, still it pains me to spend that much on just a jar of ghee.

The Solution

I buy my own ghee from grass fed butter. I can get Kerrygold grass fed butter at Trader Joe’s for $2.79 for half a lb. When I make my own ghee (with this recipe) I get approximately 6 ounces of ghee per every 8 ounces of butter. That makes homemade ghee cost me $7.44 a lb. The above grass fed ghee would have cost approximately $30 a lb. Even if I only use 1 lb every 4 months, I would save around $68 a year. Worth it me!

Total Savings Per Year: $320

Coconut Milk

I have an asian grocery store right down the block from me so I can get coconut milk for around $1.75 a can. I know that is fantastic and I usually just use it out of the can. But I always keep shredded coconut on hand for the alternative if I need it. I only buy one can of coconut milk for each week to keep costs down. But if I need more, I make this cheapskate substitute that works in works in most recipes just as well.

The Solution

1 cup of coconut flakes to two cups of boiling water in the blender. This comes out to about 78 cents per 16 ounces or can for me. I only use this when I run out of coconut milk in the can because it is a bit thinner then straight coconut milk. However, it works in a pinch and keeps me from going to the store. I only end up using this about once a month, so the savings are about $1 a month or $12 a year. Again, this is more to keep me from going to the store and buying more then I need.

Total Savings Per Year: $332

Now I know that may not seem like a lot, but these are just base savings. If I don’t go to the store chances are I won’t spend any money. Even if I do only pick up the one thing that I am going to the store for (which never happens by the way) I am still saving money. Not to mention time and gas money saved. It is all about keeping everything in perspective and knowing you can do it cheaper at home.

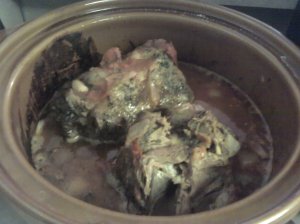
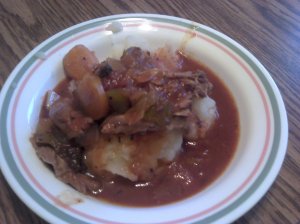
Slow Cooker Braised Lamb Necks

Slow Cooker Braised Lamb Necks

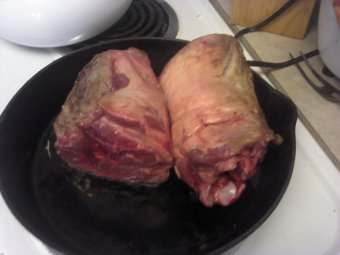
When I called my local health food store to ask for cheap cuts of pasture raised animals in this post, they offered me lamb necks for $1.99 lb. I decided to order the lamb necks and figure out what to do with them later. Upon a google search, I found that most recipes for lamb neck were coated in flour and served over rice or white potatoes. I decided to put together my own braised lamb neck recipe right then and there. It turned out spectacularly delicious. I am sharing it tonight in hopes that you will find it to be just as good.

Slow Cooker Braised Lamb Necks

Ingredients:

2 lamb necks

2 tbsp ghee

1/2 cup sliced carrots

2 tomatoes, roughly chopped

2 ribs of celery, chopped

1 onion, chopped

5 cloves of garlic (crushed but not minced)

1 can of tomato paste (6 ounces)

1/2 cup rice wine vinegar

1 1/2 cups chicken stock

4 springs thyme

salt and pepper to taste

Directions:

1) Melt ghee in a skillet and brown the lamb necks. You want them to get a caramelized colour. This will help them hold in their flavour.

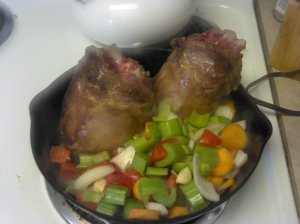
2) Add the veggies to the same pan to brown them in the ghee and lamb drippings.

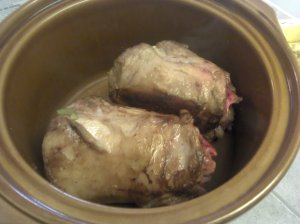
3) Remove the meat and place in the crock pot. Continue to brown the veggies for about 4-5 minutes.

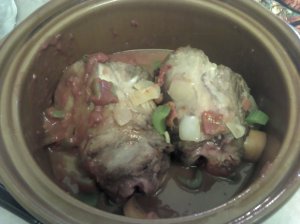
4) Add Veggies to crock pot, along with chicken stock and tomato paste. Season with salt, pepper and thyme.

5) Cook on low for 8 hours. Forget about it until then. It is just doing it’s thing while you are doing your thing.

6) Serve over mashed cauliflower and enjoy!!

This was a huge hit! Even the non-paleo neighbor liked it. 🙂 Best part is the whole crock pot full cost me less than $8. I call that  a win.

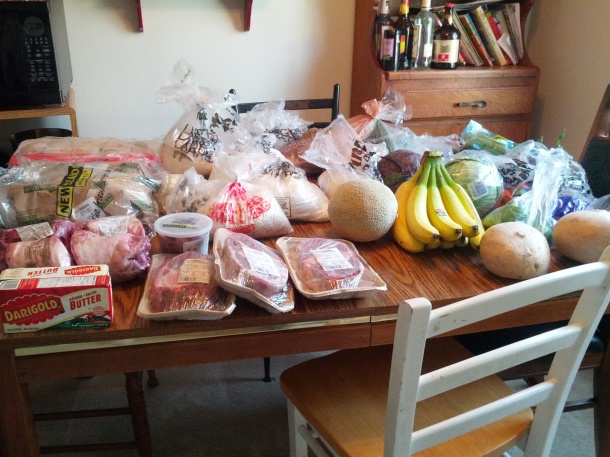
Grocery Haul 8/10/12

I thought I would start doing these grocery hauls to show about what I buy every two week period and give an idea of what I spend.   But first, here is an idea of  my shopping guidelines.

1) I prioritize ethically, raised pasture raised meat and eggs, above all else.  I pay a little bit more for it, but I also spend a good amount of time to trying to find the best price on meat per pound. As mentioned, in this previous post.

2) I don’t buy extra fats. I only use cooking fats, which are cheap and easy. I use lots of pasture ghee and beef tallow. I get both for under $1 a lb and render the beef tallow myself in my crock pot.

3) As a result of prioritizing meat over produce, I buy conventional produce or the highest quality I can afford. I would usual go to the farmers market but, this week my step brother is getting married and we are moving in two weeks. Again, just do the best you can. I always peel conventional produce if it can be peeled and wash it the best I can.

4) I try not to  spend more than $1 a pound on produce; that is what fits in to my budget right now. We eat about 20 pounds of produce a week. I know that is a lot but, that is the base of all our meals. This is possible by focusing on loss leaders at the supermarket and only buying in season at the farmers market.

5) You will notice a bit more starch in our diet than in most, I use it as fillers not as the main part of the meal. We do eat regular potatoes, peeled and in small quantities to beef up the meal. I figure it is the lesser of all the evils as far as starches. I do eat sweet potatoes also, but they are triple the price.

6) I only buy things in cash. I take out the amount I can spend and put whatever I have left into the “bulk fund” for larger purchases later on.

Anyway, here is the haul.

Here is the breakdown of the haul:

New Seasons Market (a local whole foods type market):

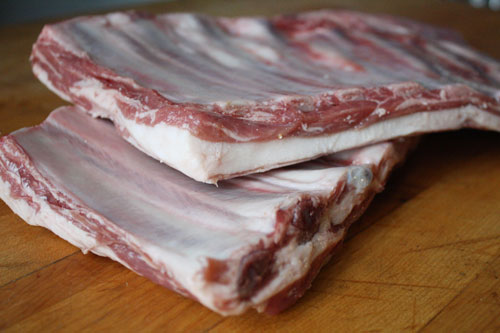
5.8 lbs Pasture Raised Lamb Ribs

7.2 lbs Pasture Raised Lamb Neck

5.3 lbs Pasture Raised Beef Shanks

5.3 lbs Free Roaming Turkey Necks

.5 lbs Chicken Livers

Total: $56.18

Winco:

2.81 lbs Zucchini

2.88 lbs Sweet Potatoes

3 Green Bell Peppers

2 lbs Carrots

4 Cucumbers

6 lbs Red and Green Cabbage

5.65 lbs Jicama

2 Eggplants

5 lbs Russet Potatoes

3 lbs Onions

3.4 lbs Cantaloupe

4 lbs Bananas

1.5 lbs Celery

10 lbs Chicken Thighs (for homemade cat food)

2 lbs Butter

5 Limes

Non-paleo items for the non-paleo SO:

5.2 lbs Whole Wheat Flour

1.85 lbs Oatmeal

4.4 lbs White Flour

1 lb Instant Non-fat Milk

2 lbs Short Grain Rice

Total: $58.58

Total for two week shopping haul: $117.55

This will be enough to last us about two weeks. I ended getting about 44 lbs of produce for the next two weeks, that averages out to about 60 cents a pound. Using this strategy means I can’t be to picky but, cuts my grocery bill in less than half. I will be sharing recipes this week for the unusual cuts of meat this week. I had $120 pulled for this two week shopping trip and managed to keep in under that mark, which makes me very happy. This is my first time trying to do a two week haul and I will be more adept at it the next time I do it.

Call your local butcher, farm, health food store or co-op now. Seriously.

Lets start with this plain and simple fact. When I eat ethically- pasture raised meat I feel like this..

But when I realize the toll it takes on my wallet I feel like this:

At $5 lb for just grass fed ground beef. I can’t do it.  I have about $80 a week budgeted for groceries for two people. That may seem like a lot, but I make food a priority and make cuts other places just to be able to afford that much. I get a CSA box every week for $30, which leaves me $50 a week for meat and other groceries. When I factor in the other groceries I end up with about $40 a week for meat. (give or take) Now comes the nitty gritty math. My SO and I eat 3 meals from home most days a week. We rarely go out. Everything we eat comes from this grocery shop. I also count on us eating between 4 and 5 ounces of meat at each one of these meals. So..

(4.5 ounces x 3 meals a day x 7 days a week)/(16 ounces per pound)   =Pounds of meat needed

Which comes out to 5.9 lbs or 6 lbs of meat per person per week. For each week I need to buy appropriately 12 lbs of meat a week to feed both my SO and me.  That means..

$40 per week/12 lbs= $3.33 per lb

I can spend $3.33 per lb on meat a week. I know that might’ve been boring, but I needed to make the point that even $5 lb for grass fed ground beef is out of the question. After watching “Food Inc.” and reading Don’t Eat this Book  along with It Starts With Food I can’t bring myself to buy conventional meat.  I know what is healthiest for me and for me, buy spending a bit more on groceries I sidestep more then $500 a year in doctors bills and painful visits. These are my choices and I do whatever I can to make them.

Back to the title. I started trying to find a better way to buy cheap meat. I started at this blogger page: Figuring Out the True Cost of Meat. This Awesome post gave me an idea of what to ask for when I got the information for the local butcher.  When I got the information for the local butcher, I emailed him asking about value cuts of ethically raised meat. When I got the email back, he told me I could get pasture raised lamb necks and ribs for $1.99 lb. Seriously, $1.99 lb! Along with turkey necks for $1.99 lb and pasture-raised center-cut beef shanks for $3.49 lb. Amazing. These aren’t the promo cuts of meat that most people think of when they think of lamb or beef or turkey, but the price is right and taste really good when slow cooked. It requires a little planning, you may have to start a couple hours before dinner or pop it in the crockpot before you head to school or work, but if this kind of meat is important to you, then it is well worth it. I am including steps below to help you figure out how to make this work for you.


How to Acquire Ethically Raised Meat for Much, Much Less:

1) Google it. Google your city, town or state and grass fed, pasture raised meat. Find a local farm, c0-0p or health food store with information on how to get ahold of them.

2) Email or call the butcher. Ask them about “Butcher Cuts” or specific cuts of meat that you know to be tougher or less popular. They will most likely have them or be able to get them pretty easily. You will probably have to special order them through a co-op or health store.

3) Pick up these special cuts (you may have to contact a few butchers or co-ops or stores to find a good price but, it is well worth it).

4) Find good recipes, cook and eat.


I will be posting recipes for these odd cuts, as paleo recipes for these cuts seem to be fewer and further between on the internet. There are many ethnic recipes for these cuts and I will be “paleoizing” them for uses of these meats.

Hopefully that is a help!!

Paleo Stroganoff

Ours was more for less actually. But you get the idea.

We found ground beef (80% lean) on sale at Safeway last week, a four pound package for $1.74! That averages out to less than $.0.50 a pound. I divided it up into three packages and put in the freezer. Last night, we both got home at around seven and looked at the clock, realizing we hadn’t taken anything out for dinner. I asked my boyfriend to thaw a package of the ground beef…my mistake.

In his defense, I knew he couldn’t cook and I wasn’t paying enough attention to what he was doing. Anyway, so we were left with brown, very unhappy ground beef. I couldn’t bring myself to throw it away, meat is usually expensive and I wasn’t about to say goodbye to that great deal we managed to find. (No siree). Enter Stroganoff. I remembered as a kid this being served with leftovers from a previous ground beef meal, this microwave meat should be no problem, right? I totally ad libbed this recipe, but it turned out super good for us.

Paleo Stroganoff

Serves 3

Ingredients:

1 lb browned ground beef (you can cook it specifically for this purpose or use leftovers)

1/2 tablespoon coconut oil

3/4 cup beef broth

3/4 cup canned coconut milk

1 cup chopped onion

1 1/2 cups mushrooms

1 teaspoon Dijon mustard

1 tablespoon Worcestershire sauce

1 teaspoon arrowroot flour (for thickening)

1) Heat skillet to medium high and add coconut oil.

2) Once coconut oil is melted, add ground beef and onion. Sauté the onions with the ground beef (garlic would also be a nice addition here.)

4) Add the beef broth, coconut milk, Diijon mustard and Worcestershire sauce. Lower the heat to medium low and simmer for four to five minutes.

5) Mix the sauce and arrowroot flour in the pan to get a slightly thicker sauce. Make sure the arrowroot flour is mixed in really well. You don’t want to end up with clumps. (this step isn’t necessary but, does yield a thicker sauce)

6) Add the mushrooms about four minutes before serving to keep they’re integrity.

We mixed in these noodles.

Yam Noodles!! Who knew!

You could also use squash noodles, sprialized kohlrabi or cauliflower rice. The possibilities are endless here.

Bon Appetite,

Rebecca

Tex-Mex Pulled Pork

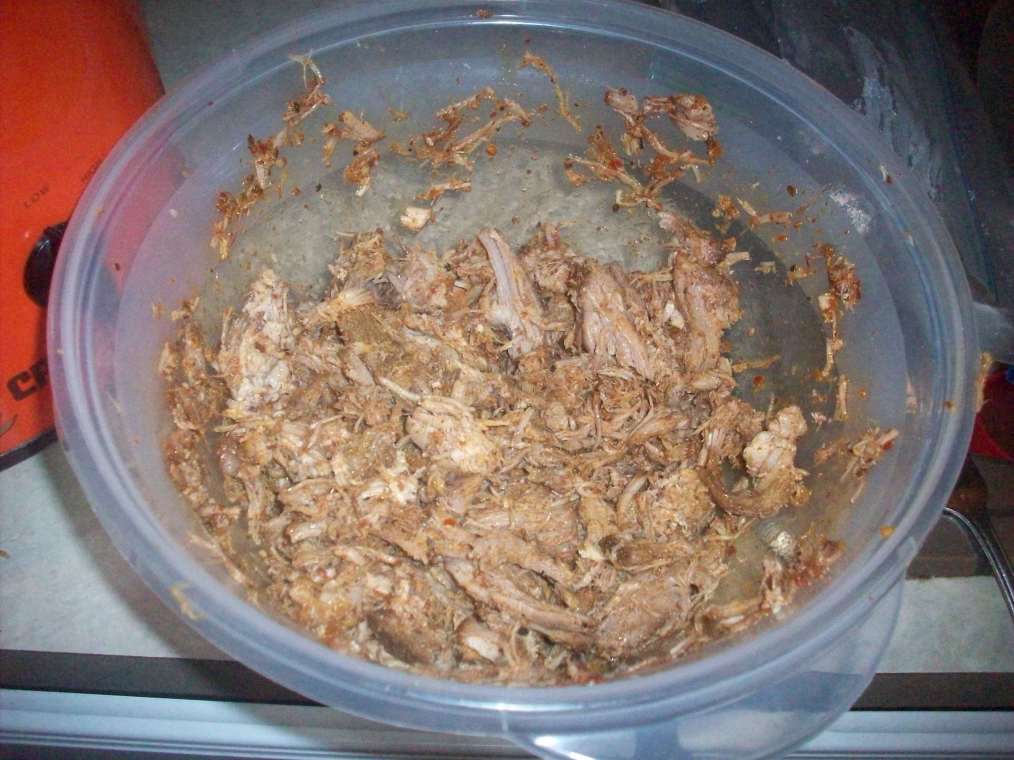
Image

About a month ago I was given around 4 pounds of pork shoulder. Saturday I finally cooked it up with this very frugal (almost) paleo, easiest recipe ever.

Tex-Mex Pulled

Ingredients:

4-5 Ibs Pork Shoulder (or Pork Butt as it is sometimes called)

1 package of Taco Seasoning

1 Large Onion Chopped

Equipment Needed:

A large bowl

A crock pot

A cutting board and Knife

1) Chop up the onion. It doesn’t matter how the onion looks, it is for flavour purposes only. Place the onion        in the bottom of the crock pot.

2) Wash and pat dry the meat.

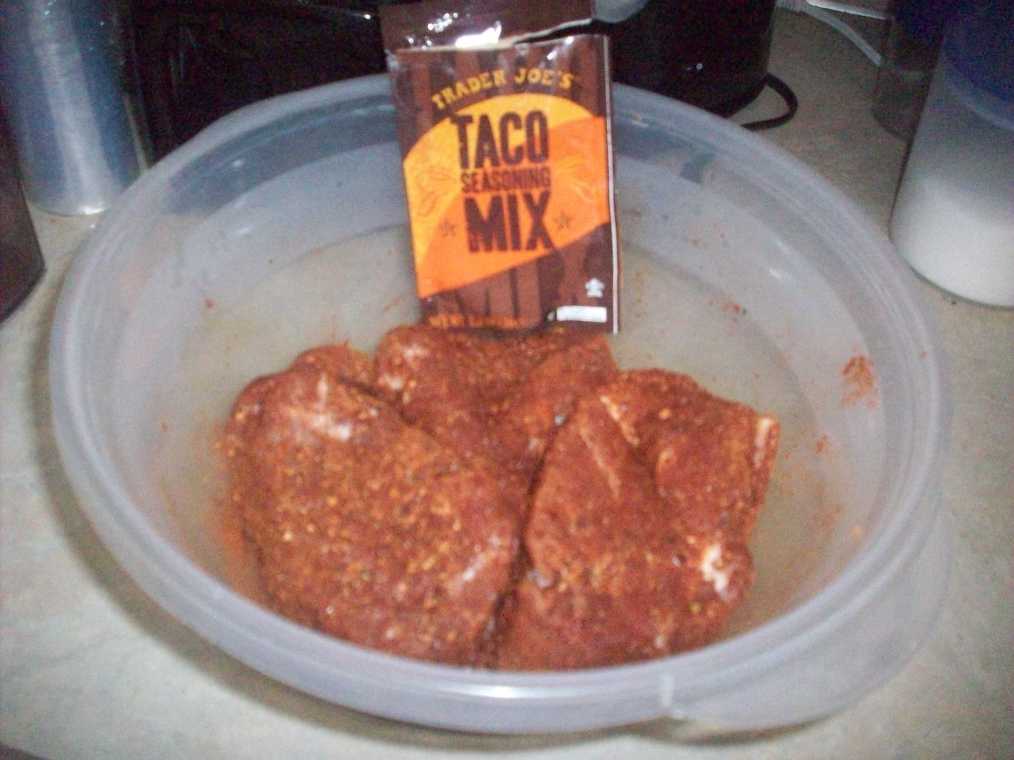
3) Empty the contents of your taco seasoning into the bowl and place the meat on top of it. Work the meat until it is completely covered with the seasoning.

Image

4) Put the meat in the crock pot on top of the onions. Try to make sure as much of the meat is touching the onions as possible. The onions contain a lot of the liquid that will help the meat cook.

5) Put the lid on the crock pot and cook on high for one hour, then set the temperature to low for at least five more hours. You can leave it longer but, I wouldn’t leave it on low longer than eight hours.

6) Remove the pork and use a two forks to shred or pull apart the pork. Volia! You have dinner.

Now the taco mix I used had sugar in it and therefore was not paleo. I just had it hanging around in my cupboard and needed to use it. I am sure you can use any taco seasoning for this or a mixture of onion powder, garlic powder, salt, paprika, cumin and chilli powder to get the same results. I will experiment when we have pulled pork again. There is also very little seasoning on each serving of pork, so once in a while this isn’t a terrible meal.

Happy Eating,

Rebecca

Lessons in Meal Planning and Staying on Track

Image source

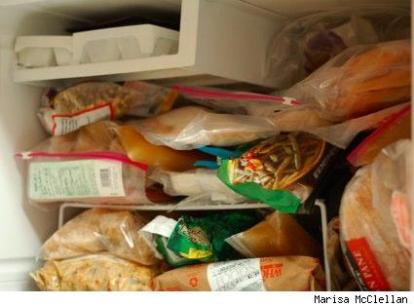
Today is my prep day. I started by pulling up this sheet from simplyglutenandsugarfree.com and asking my boyfriend to rummage through the freezer and label what he found, while I wound down after a long day. Yes, sometimes all of us need to ask for a helping hand. I realized after looking at my rent and utility bills, maybe the next few weeks would be a great time to clean out our over-stuffed freezer and pantry. Some of the meals won’t be pretty or luxery but, we won’t go hungry.

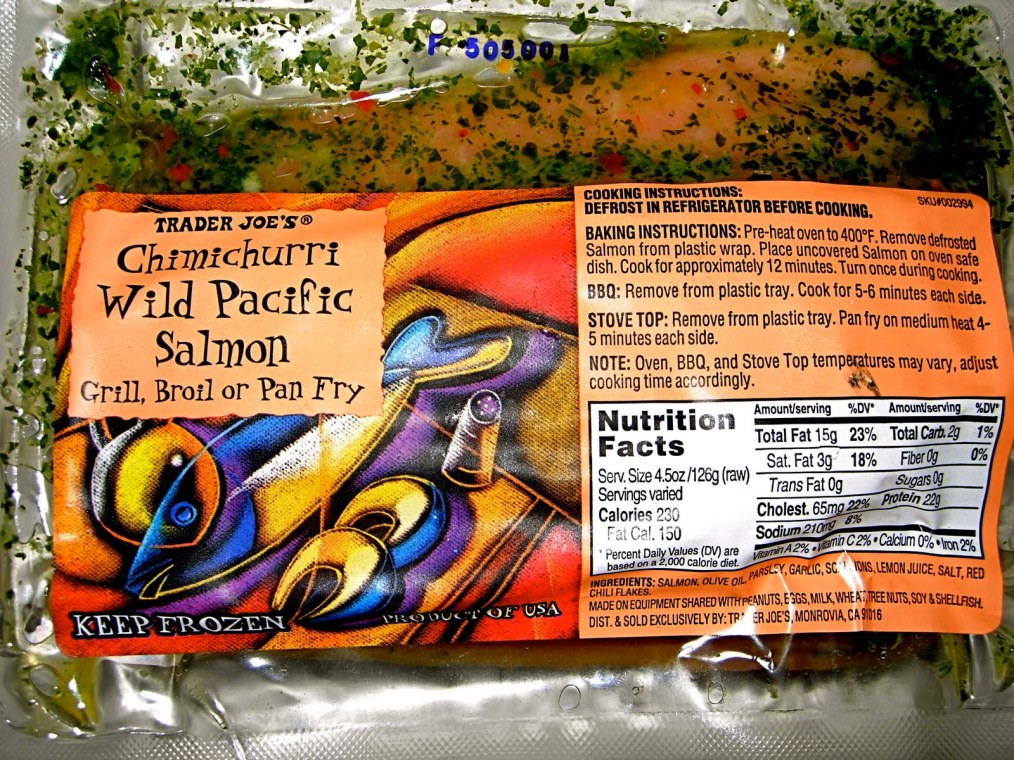
The number one thing I have learned around here is that we take it one day at a time with meal planning. At least for now. I never know from one day to the next how it will look. The google search bar is my friend. I look in the fridge then, look  in the freezer and type in a few ingredients to the search bar plus paleo and presto. A meal is born. Other times I am more prepared and have the search already done and a crock pot of food when we get home. This works for us because I buy meat when it is on sale and freeze and because we get our produce delivered cheaply every week. This week I am taking baby steps. I have tomorrow’s meals all planned. I already have this out to thaw.

Image

source

To prove how serious I am at this meal planning thing, until I get the hang of it I will be posting my daily meal plans. For tomorrow, here is the game plan.

Breakfast: A half a grapefruit each, two eggs and breakfast greens.

Lunch: Stir fried veggies (featuring sun chokes, bok choy, broccoli, carrots, parsnips and tamari) with a little left-over chicken

Dinner: This lovely salmon, salad and roasted root veggies (Recipe from The Whole Life Nutrition Cookbook)

Think that covers everything for this evening.

Cheers,

Rebecca

The beginning of something..

Lets just start by saying I am not perfect; the purpose of this blog is to mostly hold myself more accountable to my goals of A) staying truly paleo and B) doing that on a shoestring budget. Apparently the fact that I feel better when I eat like this and lose weight (gasp!) wasn’t enough for me. So here I am telling the world what I eat everyday to make sure I am not cheating. Food is my weakness but, it is also my strength, for I know it is something I can control in my life. To start I would like to post this image as a guideline of what I follow.
More Health and Fitness News & Tips at Greatist.

I think that image about sums it up. Since I am also a college student I will be attempting to do this for two people on $60 a week. A little more than a SAD diet might cost but, I am going for health in the long haul here. I foresee a lot of crock pot meals these next few weeks.


Some rules:

1) I will only buy free range, hormone free or organic meat. I will always get what I can afford in my budget for the week, sometimes that may mean skipping; others I maybe able to go full organic.  (I may not be able to afford grass fed but, as a paleo I feel this is what I have to promise)

2) I will buy as much organic produce as my budget allows.

3) While “cutting carbs” seems so Atkins, I will be loosely counting my carbs to not be tempted by too much fruit or grains.

4) I will follow the primal diet of no dairy, refined sweets, no grains (gluten included) with an emphasis on vegetables and protein.

5) I will try to maintain and perfect this in 90 days of recording everyday my meals and every week my grocery bills.


I know this is a lot to swallow but, some of us (me!) need structure and a challenge to really make it stick. I only really need to lose a few pounds, so that is not my end all goal here. My goal is to feel better and become healthier. Anyone is also welcome to participate in my challenge, if they would like or you are welcome to create your own personal challenges to follow with mine. I will happily link blogs that are doing similar challenges. I will start tomorrow by trying to use only groceries in the house to feed us until next week (for us starts Wednesday, which I will explain why later) and logging all meals with lose nutritional information.


Wish me luck,

Rebecca


When Life gives you Carrots

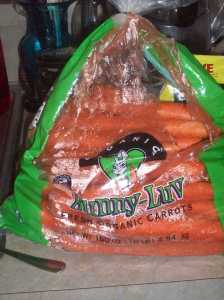
So Monday I was nannying for my cousins and grandmother decided that this was a proper form of payment (or at least partial payment)..

10 pounds of Carrots

Around here, when life gives us ten pounds of carrots, we don’t complain, we blanch and freeze. We have a chest freezer for a reason, we don’t waste, even with two people. I do the same thing when I have to much from my organics to you order. This week I had to blanch and save beets, broccoli, brussel sprouts along with the ten pounds of carrots. Since I am still getting used to the process it took me awhile to get the hang of it. Blanching stops enzymes from continuing to age the vegetable after it is frozen. So in sort hand blanching= longer, more quality freezer life. The first ten pound bag of carrots took me two hours to blanch and freeze. Tonight, I did five pounds of different vegetables in thirty minutes. Practice makes perfect. One thing I will say about this is it is definitely for people who have more time then money; you can buy frozen vegetables. I get fresh every week and my family pays me in carrots, so this works for me. You will have to decide if the process is worth it to do it for you.

How to Blanch and Freeze Vegetables

  1. Cut and prepare your vegetables. You want them to be washed and as uniform as possible.
  2. Boil a pot of water. You want to use about a gallon of water for every pound of vegetables. Otherwise, your vegetables will not cook evenly or quite right.
  3. Submerge the vegetables in the boiling water. Start timer when the water returns to boiling. While the vegetables are being blanched prepare the ice- bath.

    Blanching Times*

    Vegetable Blanching Time
    (minutes)
    Artichoke-Globe
    (Hearts)
    7
    Artichoke-Jerusalem 3-5
    Asparagus
    Small Stalk
    Medium Stalk
    Large Stalk
    2
    3
    4
    Beans-Snap, Green, or Wax 3
    Beans-Lima, Butter, or Pinto
    Small
    Medium
    Large
    2
    3
    4
    Beets cook
    Broccoli
    (flowerets 11/2 inches across)
    Steamed
    3
    5
    Brussel Sprouts
    Small Heads
    Medium Heads
    Large Heads
    3
    4
    5
    Cabbage or Chinese Cabbage
    (shredded)
    1 1/2
    Carrots
    Small
    Diced, Sliced or Lengthwise Strips
    5
    2
    Cauliflower
    (flowerets, 1 inch across)
    3
    Celery 3
    Corn
    Corn-on-the-cob
    Small Ears
    Medium Ears
    Large Ears
    Whole Kernel or Cream Style
    (ears blanched before cutting corn from cob)
    7
    9
    114
    Eggplant 4
    Greens
    Collards
    All Other
    3
    2
    Kohlrabi
    Whole
    Cubes
    3
    1
    Mushrooms
    Whole (steamed)
    Buttons or Quarters (steamed)
    Slices steamed)
    5
    3 1/2
    3
    Okra
    Small Pods
    Large Pods
    3
    4
    Onions
    (blanch until center is heated)
    Rings
    3-7
    10-15 seconds
    Peas-Edible Pod 1 1/2-3
    Peas-Field (blackeye) 2
    Peas-Green 1 1/2
    Peppers-Sweet
    Halves
    Strips or Rings
    3
    2
    Potatoes-Irish (New) 3-5
    Pumpkin cook
    Rutabagas 3
    Soybeans-Green 5
    Squash-Chayote 2
    Squash-Summer 3
    Squash-Winter cook
    Sweet Potatoes cook
    Turnips or Parsnips
    Cubes
    2

    *blanching times are for water blanching unless otherwise indicate

    Source

  4. Use another pot for the ice bath.  You want the bath to be about 1/3 ice to insure you stop the cooking process.
  5. Let the vegetables sit in the ice bath for the same amount of time as the cooking time, then drain.
  6. Dry the vegetables and pack them up in ziplocs or freezer safe containers. Make sure to label them and use them wi
  7. thin six months to a year (for some vegetables).

This is meant to be a quick guide. There are many, many resources on blanching and freezing vegetables. I hope this helps everyone!

Thanks,

Rebecca